
Principles
The need to use Multi-Factor Authentication (MFA)/Two Factor Authentication (2FA) has become part of everyday life, especially since 2019 and the move to home and hybrid working. The need to keep both personal and work data secure has always been a consideration, but now it’s seen as a requirement, a matter of principle.
The principle of MFA/2FA is to act as a secondary locking mechanism between you and any data you require to access for work or personal use. With a key component of the MFA cycle being a mobile phone or tablet device, which can be either personal or work owned. Without access to these devices the MFA process will be only partially complete and access to any data secured, as the MFA process cannot be completed.
The reason that these devices work is that they require an authorised individual to sign into them, by PIN/Biometrics/Passwords, before the MFA/2FA applications themselves can be accessed. So, in reality the MFA/2FA cycle needs 3 main components:
- A device you wish to access data on.
- A device to use to authorise access to the data.
- A human to interact with the aforementioned devices (you).
Implementation
Implementation of an MFA/2FA operation can be initiated either by an online account you wish to access, i.e., online banking etc. or directly by the IT support team for the company you work for.
When it comes to personal data access it is up to the individual how they approach setting this up. Regardless of the situation there will always be a password, to access the initial stage of requesting MFA/2FA for the website or application you wish to access, be it from a mobile device or the work desktop.
The MFA/2FA process can be carried out using a number of factors:
- Emailed One Time Password/Pass Code – This will be sent to an agreed and authorised email address (preferably business) and will be time limited as to how long it will remain active before a new code is required.
- Use of an authentication application, such as Google Authenticator or Microsoft Authenticator – These applications will generate random number groups at regular intervals, which the application/site you are attempting to access will be already aware of, and also be time limited for use.
- Use of an individual’s biometric data, i.e., fingerprint, iris scan or facial recognition (dependent on the device’s capabilities, being used to carry out the MFA/2FA process).
The following section goes through the process of an individual setting up MFA/2FA on their mobile device using the application-based tools mentioned above.
Step-by-Step
A typical MFA process looks like this:
Registration: A person links an item, such as a mobile phone or a key fob, to the system and asserts that this item is theirs.
Login: A person enters a username and password into a secure system.
Verification: The system connects with the registered item. Phones might ping with verification codes, or key fobs might light up.
Reaction: The person completes the process with the verified item. Entering verification codes or pushing a button on a key fob are common next steps.
Step One: Download and install the Microsoft Authenticator app
The following is extracted directly from here.
The Microsoft Authenticator app helps you sign into your accounts when you’re using two-step verification. Two-step verification helps you to use your accounts more securely because passwords can be forgotten, stolen, or compromised. Two-step verification uses a second step like your phone to make it harder for other people to break into your account. You can use the Authenticator app in multiple ways:
- Two-step verification: The standard verification method, where one of the factors is your password. After you sign in using your username and password, you can either approve a notification or enter a provided verification code.
- Phone sign-in: A version of two-factor verification that lets you sign in without requiring a password, using your username and your mobile device with your fingerprint, face, or PIN.
- Code generation: As a code generator for any other accounts that support authenticator apps.
- Authenticator works with any account that uses two-factor verification and supports the time-based one-time password (TOTP) standards.
Your organization might require you to use the Authenticator app to sign in and access your organization’s data and documents. Even if your username appears in the app, the account isn’t set up as a verification method until you complete the registration. For more information, see Add your work or school account.
Download and install the app
- Install the latest version of the Authenticator app, based on your operating system:
- Google Android. On your Android device, go to Google Play to download and install the Authenticator app.
- Apple iOS. On your Apple iOS device, go to the App Store to download and install the Authenticator app.
Important: If you’re not currently on your mobile device, you can still get the Authenticator app if you send yourself a download link from the Authenticator app page.
Set up two step verification on Authenticator
To secure your account, the Authenticator app can provide you with a code you provide additional verification to sign in. No need to wait for texts or calls. The following instructions ensure only you can access your information.
Install the Authenticator app
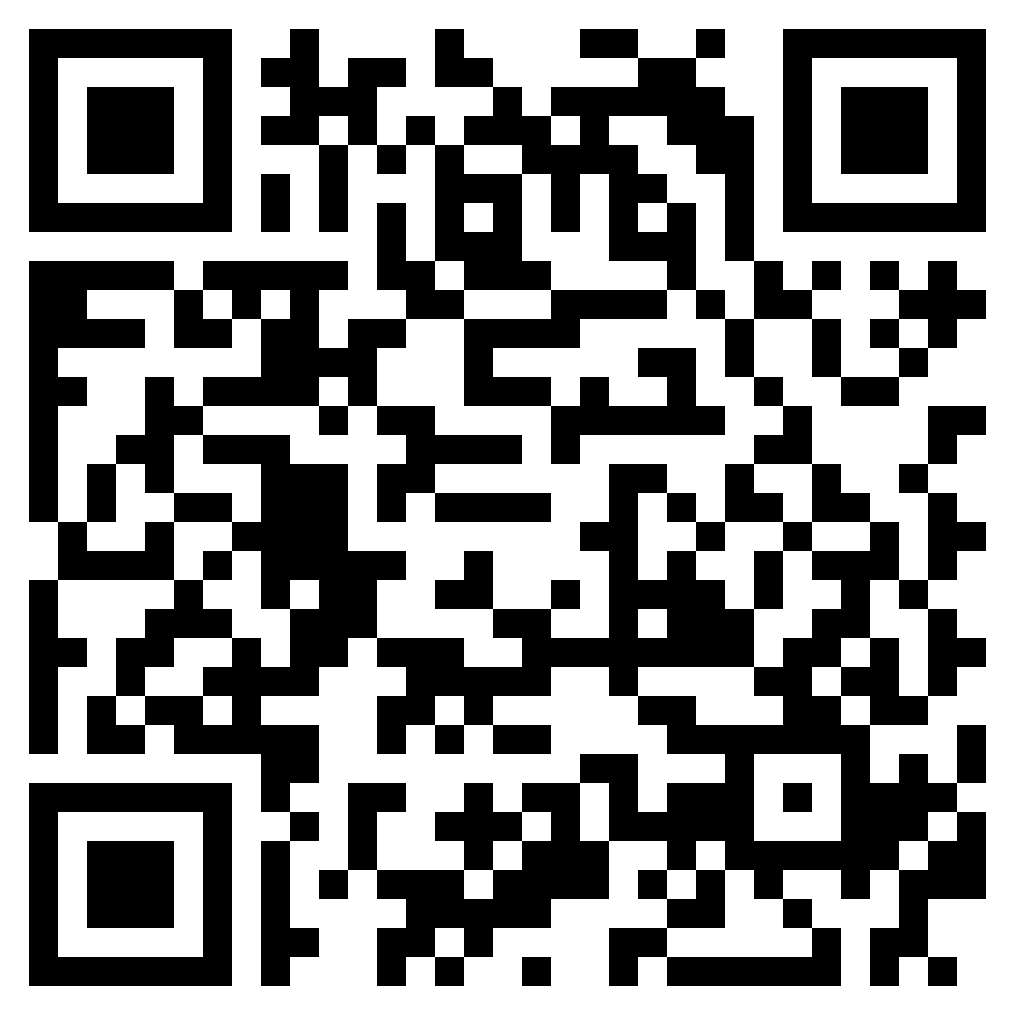
- To install the Authenticator app on an Android device, scan the QR code below or open the download page from your mobile device.

- To install the Authenticator app on For iOS, scan the QR code below or open the download page from your mobile device.
Set up the Authenticator app
After you install the Authenticator app, follow the steps below to add your account:
- Open the Authenticator app.
- Select (+) in the upper right corner.
- Point your camera at the QR code or follow the instructions provided in your account settings.
After your account appears in your Authenticator app, you can use the one-time codes to sign in. For more information and support on the Authenticator App, open the Download Microsoft Authenticator page.
Next steps
Set up security info to use text messaging (SMS). Enter your mobile device number and get a text a code you’ll use for two-step verification or password reset.
Set up security info to use phone calls. Enter your mobile device number and get a phone call for two-step verification or password reset.
Add non-Microsoft accounts to the Microsoft Authenticator app
If you have non-Microsoft accounts, such as for Google, Facebook, or GitHub, you can add them to the Microsoft Authenticator app for two-step verification. The Authenticator app works with any app that uses two-step verification and any account that supports the Time-based One-time Password (TOTP) standards.
Add personal accounts
Generally, for all your personal accounts, you must:
- Sign into your account, and then turn on two-step verification using either your device or your computer.
- Add the account to the Authenticator app. You might be asked to scan a QR code as part of this process.
If this is the first time, you’re setting up the Authenticator app, you might receive a prompt asking whether to allow the app to access your camera (iOS) or to allow the app to take pictures and record video (Android). Allow the app to use the camera so that you can take a picture of a QR code in one step. If you don’t allow the camera, you can still add the code manually as described in Manually add an account to the app.
In this article, we’re providing the process for your Facebook, Google, GitHub, and Amazon accounts, but the process is the same for other apps, such as Instagram and Adobe.
Add Your Google Account
Add your Google account by turning on two-step verification and then adding the account to the app.
Turn on two-step verification
- On your computer, go to the Google account two-step verification page, select Get Started, and then verify your identity.
- Follow the on-page steps to turn on two-step verification for your personal Google account.
Add your Google account to the app
- On the Google account security page, go to the Add more second steps to verify it’s you section, choose the Set up from the Authenticator app section.
- On the Get codes from the Authenticator app page, select either Android or iPhone based on your phone type, and then select Next.
- You’re given a QR code that you can use to automatically associate your account with the Authenticator app. Do not close this window.
- Open the Authenticator app, select Add account from the Customize and control icon in the upper right, and then select Other account (Google, Facebook, etc.).
- Use your device’s camera to scan the QR code from the Set up Authenticator page on your computer.
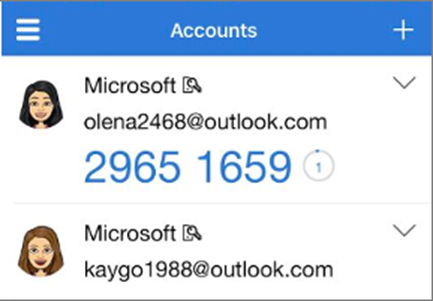
- Review the Accounts page of the Authenticator app on your device, to make sure your account information is right and that there’s an associated verification code. For additional security, the verification code changes every 30 seconds preventing someone from using a code multiple times.
- Select Next on the Set up Authenticator page on your computer, enter the verification code provided in the app for your Google account, and then select Verify.
- Your account is verified, and you can select Done to close the Set up Authenticator page.
Add Your Facebook Account
Add your Facebook account by turning on two-step verification and then adding the account to the app.
Turn on two-step verification
- On your computer, open Facebook, select the menu in the top-right corner, and then go to Settings > Security and Login. The Security and Login page appears.
- Go down to the Use two-factor authentication option in the Two-Factor Authentication section, and then select Edit.
- The Two-Factor Authentication page appears.
- Select Turn On.
Add your Facebook account to the app
- On the Facebook page on your computer, go to the Add a backup section, and then choose Setup from the Authentication app area.
- You’re given a QR code that you can use to automatically associate your account with the Authenticator app. Do not close this window.
- Open the Authenticator app, select Add account from the Customize and control icon in the upper right, and then select Other account (Google, Facebook, etc.).
- Use your device’s camera to scan the QR code from the Two factor authentication page on your computer.
- Review the Accounts page of the Authenticator app on your device, to make sure your account information is right and that there’s an associated verification code. For additional security, the verification code changes every 30 seconds preventing someone from using a code multiple times.
- Select Next on the Two factor authentication page on your computer, and then type the verification code provided in the app for your Facebook account.
- Your account is verified, and you can now use the app to verify your account.
Add Your GitHub Account
Add your GitHub account by turning on two-step verification and then adding the account to the app.
Turn on two-step verification
- On your computer, open GitHub, select your image from top-right corner, and then select Settings.
- The Two-factor authentication page appears.
- Select Security from the Personal settings sidebar, and then select Enable two-factor authentication from the Two-factor authentication area.
Add your GitHub account to the app
- On the Two-factor authentication page on your computer, select Set up using an app.
- Save your recovery codes so you can get back into your account if you lose access, and then select Next. You can save your codes by downloading them to your device, by printing a hard copy, or by copying them into a password manager tool.
- On the Two-factor authentication page, select Set up using an app. The page changes to show you a QR code. Do not close this page.
- Open the Authenticator app, select Add account from the Customize and control icon in the upper right, select Other account (Google, Facebook, etc.), and then select enter this text code from the text at the top of the page.
- The Authenticator app is unable to scan the QR code, so you must manually enter the code.
- Enter an Account name (for example, GitHub) and type the Secret key from Step 4, and then select Finish.
- On the Two-factor authentication page on your computer, type the verification code provided in the app for your GitHub account, and then select Enable.
- The Accounts page of the app shows you your account name and a verification code. For additional security, the verification code changes every 30 seconds preventing someone from using a code multiple times.
Add Your Amazon Account
Add your Amazon account by turning on two-step verification and then adding the account to the app.
Turn on two-step verification
- On your computer, open Amazon, select the Account & Lists menu, and then select Your Account.
- Select Login & security, sign in to your Amazon account, and then select Edit in the Advanced Security Settings area. The Advanced Security Settings page appears.
- Select Get Started.
- Select Authenticator App from the Choose how you’ll receive codes page. The page changes to show you a QR code. Do not close this page.
- Open the Authenticator app, select Add account from the Customize and control icon in the upper right, and then select Other account (Google, Facebook, etc.).
- Use your device’s camera to scan the QR code from the Choose how you’ll receive codes page on your computer.
- Review the Accounts page of the Authenticator app on your device, to make sure your account information is right and that there’s an associated verification code. For additional security, the verification code changes every 30 seconds preventing someone from using a code multiple times.
- On the Choose how you’ll receive codes page on your computer, type the verification code provided in the app for your Amazon account, and then select Verify code and continue.
- Complete the rest of the sign-up process, including adding a backup verification method such as a text message, and then select Send code.
- On the Add a backup verification method page on your computer, type the verification code provided by your backup verification method for your Amazon account, and then select Verify code and continue.
- On the Almost done page, decide whether to make your computer a trusted device, and then select Got it.
- Turn on Two-Step Verification. The Advanced Security Settings page appears, showing your updated two-step verification details.
Next Steps
- After you add your accounts to the app, you can sign in using the Authenticator app on your device.
- For devices running iOS, you can also back up your account credentials and related app settings, such as the order of your accounts, to the cloud.
Add personal Microsoft accounts to the Microsoft Authenticator app
Add your personal Microsoft accounts, such as for Outlook.com and Xbox LIVE accounts, to the Microsoft Authenticator app for both the standard two-factor verification process and passwordless phone sign-in.
- Standard two-factor verification method: Type your username and password into the device you’re signing in to, and then choose whether the Authenticator app sends a notification or if you’d prefer to copy the associated verification code from the Accounts screen of the Authenticator app.
- Passwordless sign-in method: Type your username into the device you’re signing in to using your personal Microsoft account, and then use your mobile device to verify that it’s you using your fingerprint, face, or PIN. For this method, you don’t need to enter your password.
Important: Before you can add your account, you have to download and install the Microsoft Authenticator app. If you haven’t done that yet, follow the steps in the Download and install the app article.
You can add your personal Microsoft account by first turning on two-factor verification, and then by adding the account to the app. You don’t have to turn on two-factor verification to only use passwordless phone sign-in for your account, but we strongly recommend that you turn on two-factor verification for additional account security.
Turn on two-factor verification
- On your computer, go to your Security basics page and sign in using your personal Microsoft account. For example, alain@outlook.com.
- At the bottom of the page, select more security options.
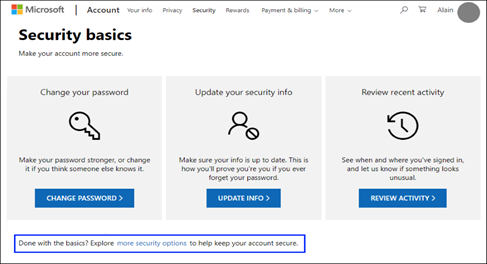
- Go to the Two-step verification section and choose to turn the feature On. You can also turn it off if you no longer want to use it with your personal account.
Add your Microsoft account to the app ,
- Open the Authenticator app on your mobile device.
- On Android, select Add account from the Customize and Control icon in the upper right.
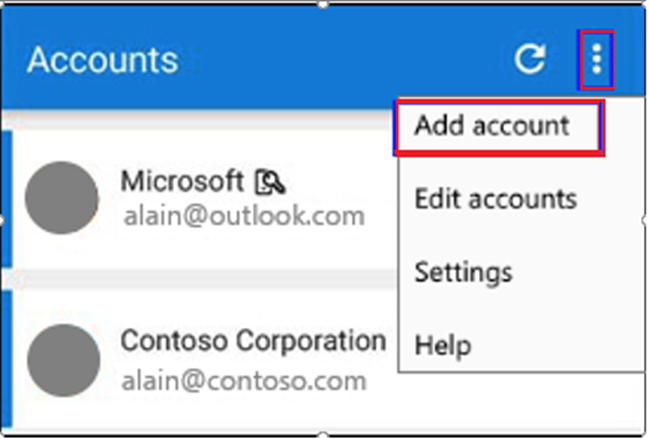
On iOS, select the plus icon in the upper right.
- In the Add account page, choose Personal account.
- Select Sign in with Microsoft to add your account. A QR code can be used when available, but you can always add your account by signing in with your username and password.
- Sign into your personal account, using the appropriate email address (such as alain@outlook.com), and then select Next.
- Note: If you don’t have a personal Microsoft account, you can create one.
- Enter your password, and then select Sign in. Your personal account is added to the Authenticator app.
Next steps
- After you add your accounts to the app, you can sign in using the Authenticator app on your device.
- If you’re having trouble getting your verification code for your personal Microsoft account, see the Troubleshooting verification code issues section of the Microsoft account security info & verification codes article.
- For devices running iOS, you can also back up your account credentials and related app settings, such as the order of your accounts, to the cloud.
Add your work or school account to the Microsoft Authenticator app
If your organization uses two-factor verification, you can set up your work or school account to use the Microsoft Authenticator app as one of the verification methods.
Important: Before you can add your account, you must download and install the Microsoft Authenticator app. If you haven’t done that yet, follow the steps in the Download and install the app article.
Add your work or school account
You can add your work or school account to the Authenticator app by doing one of the following:
- Sign in with your work or school account credentials (preview)
- Scan a QR Code
- Sign in with your credentials
Sign in with your credentials
Note: This feature is usable only by users whose admins have enabled phone sign-in using the Authenticator app for them.
To add an account by signing into your work or school account using your credentials:
- Open the Authenticator app and select to the + button and tap Add work or school account. Select Sign in.
- Enter your work or school account credentials. If you have a Temporary Access Pass (TAP) you can use that to sign in. At this point, you could potentially be blocked from proceeding by one of the following conditions:
- If you don’t have enough authentication methods on your account to get a strong authentication token, you can’t add an account. You’ll see an error in the Authenticator app that says “To set up Microsoft Authenticator, you’ll need to go to aka.ms/mfasetup on a web browser.”
- If you receive the message “You might be signing in from a location that is restricted by your admin,” your admin hasn’t enabled this feature for you and probably set up a Security Information Registration Conditional Access policy. You might also receive messages that block registration of the Authenticator app because your admin has Conditional Access policies set up. In these cases, contact the administrator for your work or school account to use this authentication method.
- If you are allowed by your admin to use phone sign-in using the Authenticator app, you’ll be able to go through device registration to get set up for passwordless phone sign-in and two-step verification. However, you’ll still be able to set up two-step verification whether or not you are enabled for phone sign-in.
- At this point, you could be asked to scan a QR code provided by your organization to set up an on-premises multi-factor authentication account in the app. You’re required to do this only if your organization uses on-premises MFA Server.
- On your device, tap the account and verify in the full-screen view that your account is correct. For additional security, the verification code changes every 30 seconds preventing someone from using a code multiple times.
Sign in with a QR code
To add an account by scanning a QR Code, do the following:
- On your computer, go to the Additional security verification page.
- Note: If you don’t see the Additional security verification page, it’s possible that your administrator has turned on the security info (preview) experience. If that’s the case, you should follow the instructions in the Set up security info to use an authenticator app section. If that’s not the case, you will need to contact your organization’s Help Desk for assistance. For more information about security info, see Set up your Security info from a sign-in prompt.
- Select the checkbox next to Authenticator app, and then select Configure.
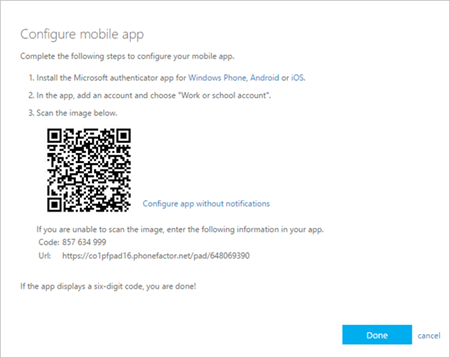
- Open the Authenticator app, select the plus icon and select Add account, and then select Work or school account, followed by Scan a QR Code. If you don’t have an account set up in the Authenticator app, you’ll see a large blue button that says Add account.
If you aren’t prompted to use your camera to scan a QR Code, in your phone’s settings, ensure that the Authenticator app has access to the phone camera. After you add your account using a QR code, you can set up phone sign-in. If you receive the message “You might be signing in from a location that is restricted by your admin,” your admin hasn’t enabled this feature for you and probably set up a Security Information Registration Conditional Access policy. Contact the administrator for your work or school account to use this authentication method. If you are allowed by your admin to use phone sign-in using the Authenticator app, you’ll be able to go through device registration to get set up for passwordless phone sign-in and Azure AD Multi-Factor Authentication.
Sign in on a remote computer
Many apps allow you to authenticate by entering a code on another device such as a PC. If you want to sign in on a remote computer to install the Authenticator app, follow these steps.
- Open the Authenticator app, and then select + > Add work or school account > Sign in.
- Select Sign in from another device.
- On the remote screen, open the Sign in to your account page and enter the code that you see in your Authenticator app.
- On your remote screen, sign in using your work or school account credentials. If you have a Temporary Access Pass (TAP), you can use that to sign in.
- After you complete your authentication on the remote screen, return to the Authenticator app to complete setup.
Next steps
- After you add your accounts to the app, you can sign in using the Authenticator app on your device.
- For devices running iOS, you can also back up your account credentials and related app settings, such as the order of your accounts, to the cloud.
Within the Microsoft help pages for the Microsoft Authenticator App further reading can be found on Back up and recover account credentials, Common problems with Authenticator, Import passwords into Authenticator, Manually add an account to Authenticator and Sign in with Authenticator, as well as additional information, such as Password Reset, for those who want to deep dive into the application.
For those who wish to use Google Authenticator, many of the stages here are similar. For further reference please refer to the following page:
https://support.google.com/accounts/answer/1066447?hl=en&co=GENIE.Platform%3DAndroid